 Sensory Bins… If you’re totally new to the concept, it’s very simple – a bin filled with items that provide sensory play. Sensory Bins often have a few key components: a bin or container; filler material; tools for manipulating the filler material; and tokens, toys, or other exploratory objects.
There are numerous blogs focused solely on Sensory Bin play and themes. I definitely find inspiration in those, but I honestly don’t do much more than rotate out tools and objects in our regular set-up. That makes it special when I come up with something totally new (or else I’m lazy and that excuse just sounded better – I’ll let you decide).
For us, rice has been a go-to filler. The reason for that is it’s affordable, it gives nice sensory input that seems to have a calming effect on our little guy, and it’s not all that difficult to clean up when it inevitably leaves the bin (it always leaves the bin). We do have smaller containers of generic-brand molding sand, and also rotate those bins with homemade play-dough. But, for the most part, our rice bin gets the most love.

My now-5-year-old began playing with Sensory Bins a couple of years ago. He’s a Thomas the Train enthusiast (although they don’t get nearly as much love anymore), and a very high-energy youngster. We first tried out the concept as a way to give him “work” when he tired of playing with his trains; nothing else seemed to hold his interest for an extended period of time. The first time we set out a rice Sensory Bin, he played for nearly two whole hours – straight!
I was sold; he was sold; and my husband, who undoubtedly thought it was another one of my hair-brained ideas (bless his heart for putting up with all of them), was sold, too.
Here are some ideas to help you get started with your own Sensory Bins.
Sensory Bins
Materials:
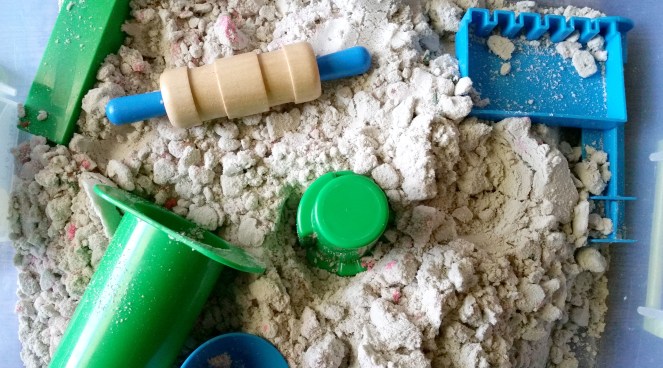
- Bin(s) – pots, pans, large plastic food containers, mixing bowls, empty egg cartons, muffin tins, ice cube trays, plastic storage bins or totes, a kiddie pool (only half-joking here – this would probably be the most awesome sensory bin ever!), etc. Typically, this activity is meant to be contained within one bin. But, my son loves to transfer things (and I’m a rule-breaker), so I’ve always given him two containers – one with everything in it, and another empty one to transfer the contents into or to collect little trinkets/toys from the bin. Just do what works for you.
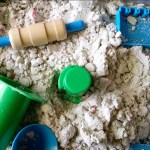
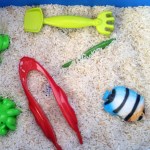
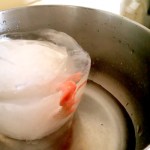
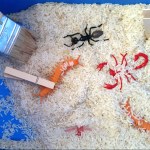
- Fill Material – Dried Foods: rice, beans, corn, pasta, seeds, cereal, nuts; Home/Office: shredded paper, pom-poms (the little felt balls, not the cheerleading kind), packing peanuts, cotton balls, loose tinsel, Easter basket grass, buttons, marbles, beads, LEGOs, coins; Natural/Outdoors: dirt, rocks, water, ice, twigs, leaves, flowers, sand; Messy/Other: shaving cream, pumpkin guts, water beads, cooked noodles, slime, fake snow, molding sand, play-dough. Basically, if you can manipulate the material and fill a container with it, it’s good to use. One quick safety note, though: be mindful of allergens and loose fill that might have fine particles that you wouldn’t want your child to breathe in.
- Tools – scoops, measuring spoons, tongs, cups, small boxes, medicine droppers, small shovels or rakes, squirter bath toys, strainers, cookie cutters, paint brushes, magnifying glass, spoons, ladles, slotted spoons, spatulas, magnets, funnels, chopsticks, tweezers, rolling pins, beakers, toothbrushes, blunt butter knives, popsicle sticks, clothespins, whisks, etc.
- Toys/Trinkets/Tokens – marbles, rocks, coins, beads, shaped erasers, small figurines, cars/trucks/planes/trains/boats, plastic animals/insects, plastic letters, balls, wooden blocks or shapes, buttons, plastic/wooden food, pinecones, sea shells, felt pom-poms, jingle bells, etc. Really, the possibilities are endless here, as you can use whatever toys you have on hand that go along with your theme. If you have no theme, you might just choose little trinkets for your little one to find buried or hidden in or under your fill materials.
What to do:
- Create your Sensory Bin by choosing any combination of containers, fill material, tools and toys. Remember to keep it simple. Just a few tools and toys are all that’s needed; you can always add more to it later or swap things out depending upon your child’s interests. You can build one from a theme (i.e. – Gem Mining: you could bury colored rocks/marbles in your filler material and include a scoop and a strainer so your child could sift through each scoop to find the buried gems), or just randomly select items you have around your home and let your child decide what and how to do her work.
- Set up the work area. This can be as simple as clearing off a coffee table or providing space on the living room floor (a reason to put away that laundry). Regardless of where you set it up, make sure your child has safe access to maneuver around the work space.
- Prepare the work surface. If your bin uses water or ice, for instance, you might want to go ahead and cover the work area with towels to help prevent damage from spills. If your bin has particularly messy or sticky materials, you may want to put an easy-wipe plastic tablecloth down.
- Once everything is set up, let your child explore the Sensory Bin. Step back and witness the beauty of your child learning!
PLEASE NOTE: The fun in Sensory Bins is allowing your little one to explore in his own way (safely, of course). This means keeping yourself in check while he plays by resisting the urge to show him how to do it (I know – I’ve totally been there myself). As parents, we sometimes forget that allowing our children unstructured play is a great way to help them develop and learn. If introducing a new tool your child has never used before, feel free to show her how it works, but allow her to explore using the tool in her own way – even if it’s not the “right” way. It’s pretty amazing to see how their little minds work as they make discoveries through play!