I have a really hard time coming up with gift ideas for the women in my family. We’re a practical bunch, with not much flair for stuff without a purpose (I can’t think of a single one of us that has knickknacks). When it comes to gifts, my mom typically likes plants for her garden or the promise of free labor (that really is her preference). She appreciates pretty things, she just doesn’t really want them; and I suppose our family is blessed in that our needs are met.
I also fit into this category, but I LOVE to give gifts. (I know, it doesn’t make any sense…)
Anyway, if you struggle with the same issue in your family, and are looking for ideas on practical (and pretty) gifts for Mother’s Day, I’ve got you covered! All of these are easy projects that take very little prep work and can easily be done in a couple of hours or less (depending upon how distracted you are by adorable children/pets/dust bunnies requiring your attention).
And if you’re totally clueless, this Sunday, May 7, is Mother’s Day – so, you’d better get busy!
Heating/Ice Pack
 This is a quick and easy project that is very inexpensive to make. You can use a fat quarter or scraps to create it, and the filler is rice. Simply cut a rectangle from two pieces of fabric and place right sides together. Sew around three edges, leaving one short side open. (Alternately, you could use one larger piece of fabric and simply fold it in half, lengthwise, with right sides together; sew around one short edge and the open long edge, leaving the second short edge open for filling.) Turn right-side out, fill 3/4 of the way with rice, and sew the open end closed with a topstitch. These can be placed in the freezer for a handy, moldable “ice” pack, or can be heated in the microwave for a minute or two and used as a heating pad. One note on fabric, however: use a cotton material, as synthetics may melt in the microwave (I typically go with a quilting weight cotton).
Relaxing Face Mask
This is similar to the heating pack, only you use flax seed for the filler (you can still use rice, but the flax seed is a smoother option), and instead of a rectangle, you create a generic mask shape. I created a pattern by placing a piece of paper over my face and outlining the bridge of my nose and around my eyes with a marker on the paper. Add about 1/4 inch all around to your pattern to account for the seam allowance. With right sides facing, sew your two pattern-shaped fabric cuts together, leaving a 3 inch gap on the top. Turn fabric right side out, fill the mask with flax seeds (or rice) and sew the opening closed. This can also be microwaved or used cold from the freezer/refrigerator.
Sugar Scrubs
Sugar Scrubs are simple to make, smell wonderful, and actually do a great job at leaving your skin soft and moisturized after a nice exfoliation. The ratio is typically 1:2 (sugar:oil) using basic white table sugar and any variety of oils (my preference is sweet almond oil or coconut oil, but you could also use a nice quality olive, avocado, grapeseed, or other oil of your choosing). You can add a few drops of essential oil* (lavender is my favorite), some dried flowers (for a splash of color and scent), or a couple of teaspoons of your favorite food flavoring/extract (mint, maple, almond, vanilla, etc.) from your pantry for a light scent.
I’ve seen some sugar scrubs that mix vanilla extract with seasoning mixes (like pumpkin pie spice) for a unique smell, but I’ve never felt the need to smell like pumpkin pie, so I haven’t tried that myself, and I would be a little wary of using a lot of spices because I’m not sure I’d want to rub cinnamon on my skin (particularly if I had a small cut or something).
Once you make up a batch, store it in a small mason jar or similar air-tight container.
For a sugar scrub that is gentle enough for the face, I recommend using brown sugar and adding a couple of tablespoons of honey. You may want to adjust the oil content slightly with the addition of the honey, depending upon your preference.
*Please note: Essential oils contain highly concentrated amounts of a particular plant/flower. Many are not considered “safe” for use by pregnant women or children, and certain essential oils can cause you to be more sensitive to sunlight (particularly citrus), may cause respiratory issues for some people, or may cause skin reactions. Please read up on essential oil safety before using them for any purpose. A fairly comprehensive read on this can be found here.
Scented Sachets
 If you’re using dried flowers in your sugar scrub, why not get enough to make a sachet set, as well? I use scented sachets in my laundry sometimes (toss in the dryer with wet laundry and enjoy the natural fragrance when you pull out your dry clothes/towels); under a pillow for a soothing and relaxing scent as I fall asleep; in drawers to keep stored blankets or out-of-season clothes smelling fresh; and I even hang one in my car like an air-freshener.
I am a big HUGE fan of lavender. I used to think it smelled a little weird, but that was back when I was still using a lot of synthetic fragrances, and I had a weird sense of smell (clean doesn’t smell anything like the “clean” smells you get in commercial laundry detergent and cleaners). Now, I find it to be a lovely mild scent that doesn’t seem to irritate even the most sensitive noses in my family.
To make the sachets, cut two squares of fabric (whatever size you want) and sew around three edges with right sides together. Turn right-side out and fill with the dried flowers of choice. Sew the opening closed with a topstitch. If you want to add ribbon for hanging, loop the ribbon and sandwich it between the right sides of the fabric (with the ends of the ribbon sticking out of the sandwich and the loop pointed toward the middle) before sewing; when you turn the sachet right-side out, the loop will be sewn into the seam of the bag and ready for hanging.
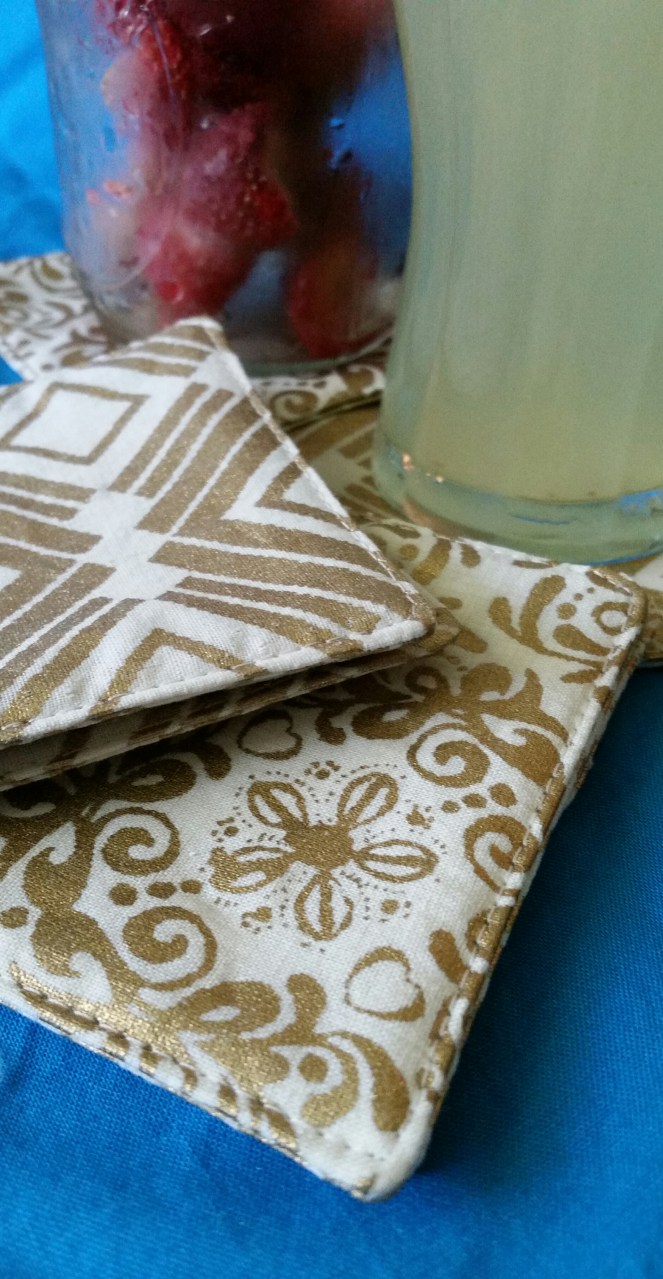
Drink Coasters / Cloth Napkins / Washcloths
 Although different things serving their own purposes, coasters, cloth napkins, and washcloths are all constructed in the same exact way, so I’m lumping them together. The same could be said for anything else you can think of that’s a flat, square-ish shape.
For Drink Coasters, I would recommend using a layer of flannel or fleece as batting in the middle layer to help with absorbancy. For Cloth Napkins, just a top and bottom layer of cotton fabric will suffice. For washcloths, I like to use flannel as the top layer and terrycloth material as the bottom layer (mainly because you can get cute flannel patterns, so it adds more interest than the plain terrycloth offers – but feel free to use whatever you want).
Cut your fabric to the desired size (two layers each – front and back – for all three projects, and one additional layer of fleece or flannel for the coasters). Place your two-layer pieces right-sides together (for the third layer, place it on top of the fabric sandwich after placing the two outside fabrics facing), and pin. Sew a 1/4-inch seam all around, leaving a 3-inch opening for turning. Clip the corners. Turn right-side out and iron flat (tucking the opening into the seam). Sew a topstitch around the entire area, being sure to sew the opening closed.
Scrappy Fabric
Any of the above projects can use Scrappy Fabric in place of regular fabric – this is merely an option to add a little interest, use up some odd and end pieces of scraps, or try something different. Scrappy Fabric just mixes and matches those scraps into a single piece of fabric that has a sort of quilt appearance (no quilting required).
Take the first two scraps and place right-sides together, sew a seam along one side to join the two pieces on a common edge; open the seam and iron it flat. Add a third piece by placing it on one of the sewn pieces (right sides together) and sew a seam along one side to connect those two pieces together; open the seam and iron it flat. Continue adding scraps until your Scrappy Fabric becomes a larger, single fabric to fit the size you want. Fuse a light or medium-weight interfacing to the wrong side of your Scrappy Fabric to help stabilize it before using it in a project.
If you have a lot of time on your hands and feel artsy, you could even use this method to create a fabric mural of sorts using a variety of shapes, colors, prints, and textures.
If you end up making any of these projects for your mom, I’d love to see them! And if you just get too crunched for time (it happens), you could always write her a nice note and offer up some free labor – moms love that!