 Following the success of attempting doll clothes with scrap material (covered in part 1), it was noted that our Pretty Little Princess had a couple of dresses that were starting to fall apart at the seams (literally).
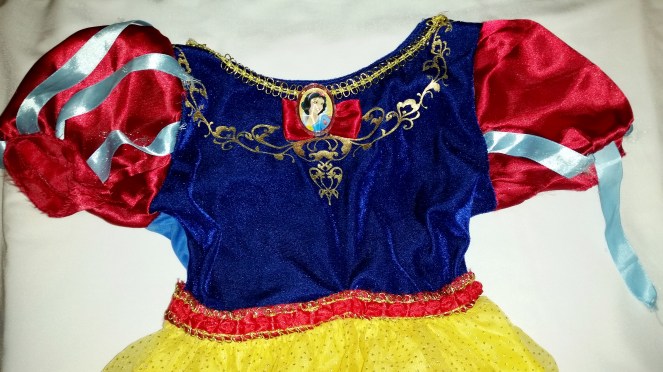
How could she be the Belle of the ball with half of her waist seam gaping from a major hole that had developed on the backside? How could she sing to the birds in her Snow White gown with ribbons that had tattered and torn? (That just wouldn’t do!)
I knew the waist seam would be an easy fix, but I was unsure of how to tackle the ribbon issue. I took both to see what could be done.
As suspected, the repair to Belle’s gown was simple and went off without a hitch.
After much investigation and consideration, I decided there was no easy way to make the ribbon repairs to Snow White’s dress without removing the sleeves. I contemplated whether or not I had the confidence to carry through with such a task as reconstructing and reattaching the sleeves.
I found this blog post about making pouf sleeves, and read through it a couple of times, checking the existing sleeve construction and deliberating over the decision. I found material that was a perfect match, so I went ahead and bought it and some new ribbon.
A couple of days later, I decided I was either going to have to go through with it, or give up. (I don’t like to give up – just ask my husband, or anyone who knows me, for that matter.) I prayed about it, because surely if anyone could help, the Lord could help.
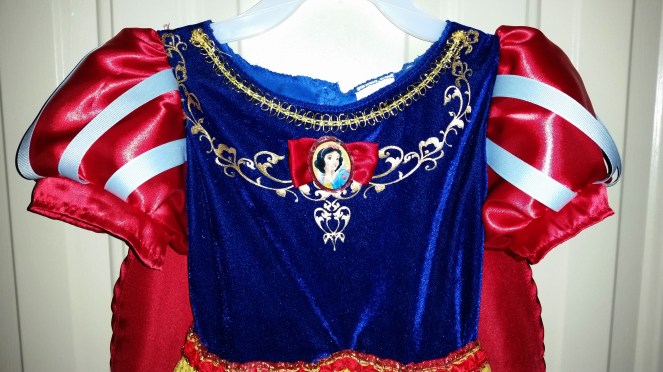
 And then, I just did it. I bit my lip and ripped the seams along the shoulder of one sleeve, completely detaching it from the dress. I slightly panicked. I texted a couple of friends for well wishes and a confidence boost (thanks, ladies, for the support!).
This is the part where I tell you everything went smoothly and it was wonderful. That’s not quite how it all happened, though…
The reason I had to rip the sleeve off to make a new one was because (1): I had no pattern for the size/scale for that particular dress, which means I had to use the existing sleeve for the pattern piece; and (2): the material used to make the original sleeve was already coming apart at the seams, so to re-use the existing sleeve would mean I’d have to make the sleeve smaller (tighter), which didn’t seem like a good idea, considering the seam was already coming apart.
 In my quest to use the old sleeve as a pattern, I traced around the sleeve pieces and fudged it to add a bit more material for the seam allowances. This is always a bit of a trial and error kind of situation.
The first sleeve I made looked pretty good, but the armband cuff at the bottom of the sleeve appeared to be more narrow than the original sleeve by the time I got done with it, so I decided to scrap that one.
 My second attempt went south when I tried to incorporate the elastic cuff (cutting both the sleeve piece and cuff piece to the same width), but still using a cuff instead of the tutorial’s suggestion to make that the end of the sleeve. If you were thinking of doing that, don’t. It won’t work. I promise.
The good news is that by my third attempt at a sleeve, I was getting better at constructing them.
I decided that since I was going to have to remake both sleeves, I would make them at the same time so it would be easier to follow along and not accidentally skip a step. (I am sometimes easily distracted or get too confident and quit following along only to discover I missed an essential step. At least I know my limitations, right?)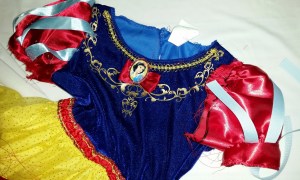
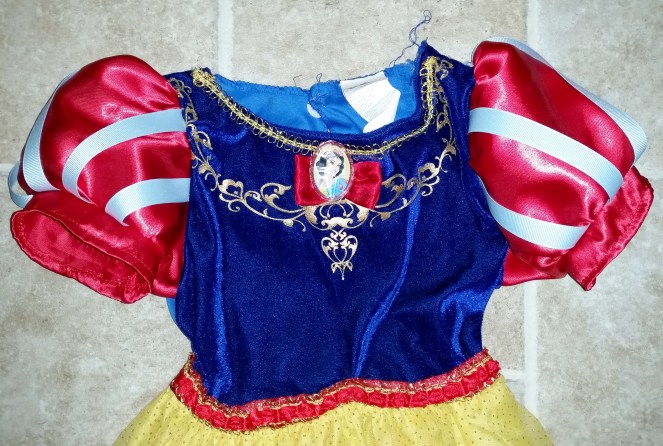
This is one of those projects that once you get it, it’s actually quite satisfactory to see the results as you go along. I was a little intimidated about reattaching the sleeve, mainly because I hoped it wouldn’t get all wonky mid-attachment, but it was (as my 5-year-old likes to say,) “Easy-peasy, lemon-squeezey.”
The second sleeve was easier, simply because the sleeve was already completed and all I had to do at that point was remove the old and attach the new.
 While I was making repairs, I noticed part of the elastic on the back of this gown had detached itself from the fabric and the threads were loose, so I finished up the project by sewing it back in place.
Now, hopefully, the gowns will have several more years of wear before they have to be retired or made into something new. I’m certain the Pretty Little Princess will get the chance to enjoy them for as long as they fit – which hopefully will be for a while longer. They grow up so fast!